Showing posts with label sally hansen. Show all posts

Thursday, January 30, 2014

Gung Hay Fat Choy!


Happy Chinese New Year! My nail art color theme is dedicated to this special holiday/event! Thought it would be a fun festive look which also works for the upcoming Valentine's Day! 

Tuesday, June 4, 2013

Polish Sighting: Sally Hansen Fuzzy Coat


Sally Hansen's textured polish display part deux is their new Fuzzy Coat. They remind me of tinsel icicles normally placed on a christmas tree, except colorful and in nail polish! But they compare it to a fuzzy yarn ball. I haven't tried this yet but I do hope they aren't prickly to the touch and do end up nice and fuzzy. The Fuzzy Coat collection comes in 8 different shades by far: Pink, Brownish Nude, Orange, Purple(?), Green, Lime Green, Blue, and Black. They run at about $8 per bottle and I found this display at Walgreens but have seen them at CVS as well. I want to say that it may be a part of their contest, if it's still going on, this might be their theme for the month of June? I'm not too sure though.

Thursday, May 30, 2013

Polishing Sighting: Sally Hansen Limited Edition Sugar Coat


Sally Hansen is almost always the "trendsetter" of the nail company world, in my opinion at least. They're always throwing out new nail polish concepts, for instance, today's Polish Sighting is their newest textured polish. They call it Sugar Coat, I call it popcorn ceiling. (LOL) Idk, if you all know what that is but in the past apartments I've lived in while growing up I remember them have bumpy consistency and this texture is just a trigger for remembrance of that! Anyways, this is a Limited Edition line and it comes complete with 8 shades. I haven't heard much about rave about these and from what I've read or heard it's an "acquired taste". If it's not obvious yet, I'm not too crazy for it but I'll eventually give it a shot. I got to give it to Sally Hansen, they're very creative, I'm not certain that they were first with this concept but regardless even their choice of colors are bold! They've got bright hues of purple, white, red, yellow, blue, mint green, pink, and last black.

Have any of you tried these babies out? Do you get any sugar dust remains after using them?


Monday, May 27, 2013

Manicure MAYhem: Day 18


Day 18: (Reuse) Sally Hansen Xtreme Wear - Breezy Blue with L'Oreal's Colour Riche Nail Lingerie - Something About Her


Wednesday, May 15, 2013

Manicure MAYhem: Day 6

Day 6: Sally Hansen's Limited Edition Complete Salon Manicure Designer Collection - Butterscotch, a collaboration with Fashion Designer Tracy Reese 


Bargain Finds: Sally Hansen Complete Salon Manicure


Today is once again a three in one type of blog, this is also a Mini Haul and Product Review. For you Sally Hansen lovers out there, especially the Complete Salon Manicure line, Walgreens is currently having a 2 for $10 sale for this Sally Hansen line until June 1st, both in stores and on their website. And if you're lucky enough, maybe you'll get your hands on manufacture coupons which range from $1 - $2 off each polish.

I was lucky enough to grab some of the Limited Edition Designer Collection which were collaborations with a mixed of known designers. The display was a tower for the Summer Looks - Hot Days / Cool Nights. (Somewhere along those lines, I'm not entirely certain of the correct wording). But it also featured their new Dry Drop. 

Anyways, back to the polishes. I swooped up First Kiss, Butterscotch & Green Tea (by Tracy Reese) and Resurrection (by Parabal Gurung). Although, If I'm not mistaken, these aren't really the newest of the "Limited Edition" line since these two fashion designers (Reese & Gurung) released their lines in the previous years. These colors (the ones I attained) are just re-released along with their newest fashion designer collaborator Alex Wang. There is a total of ten polishes with this collection, 5 from Reese (First Kiss, Butterscotch, Green Tea, Soy Latte, & Hot Lava), 3 from Gurung (Resurrection, Angel Bite, & Apparition), and 2 from Wang (White Out & Dune). 

As for their consistency, this line is supposed to be a all-in-one polish. No need for base coat, top coat, etc. It does everything for you. For the polishes I chose, I do love the colors and it didn't take long for them to completely dry after I applied them. The lighter hues took a couple or few coats while the darker hues I was able to settle with just one. 

So, so far, I'm very happy with the price - 2 for $10 - $2 off each bottle. The colors were very different and alluring. Their quality is great! The only thing I've got to get back to you on is the wear time, I haven't tested it long enough to really say. But as for everything else, I think I've pretty much covered it. 

Saturday, May 11, 2013

Manicure MAYhem: Day 2


Day 2: Upon request for a Navy & Gold "Matte Mani" I used the Revlon - Urban, Sally Hansen Xtreme Wear - Golden I, Sinful Colors - All About You, & OPI - Matte Top Coat. (Not going all out on these designs since they're removed sooner than usual.) 


Friday, May 10, 2013

Sally Hansen I Heart Nail Art Contest: May


Sally Hansen's I Heart Nail Art Contest is still going and for this month of May their new theme is "Street Style"! If you've got some "edgy" and "bold" designs you should get on entering this contest! They've got some good prizes for their winners! Maybe we'll see each others entries! Good luck to all! :) (The photo is a direct link to the entry page btw!)

Friday, April 19, 2013

Fancy Friday: Bead Me Up!

Sorry guys, this week's Fancy Friday is still lacking an accompanying video. >__<; I know! I'm sorry, but next week they will be back! Anyways, this week we're dealing with a few tedious necessities: microbeads. So let's get on with it and you can recreate Bead Me Up which looks something like this! I got my inspiration from a Japanese nail magazine! ^_^ Also, excuse the poor photo quality... *sigh*


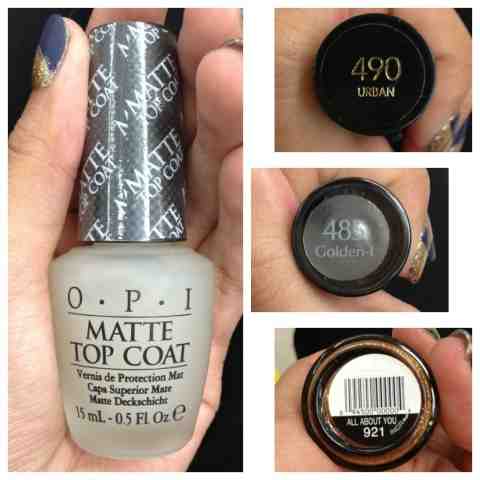
The following photos are what you'll need to make this design on your nails. The first photo is my base coat, top coat, and dry drop. (These are very dire for me). The second photo are the polishes I chose. Then, the last two photos are what I added for the design to my nails.


  • Base Coat: OPI Nail Envy
Starting off with a base coat to protect the nails. This is, by far, my favorite base coat. I actually see results using these on my oh so delicate nails! 
  • Base Color: Wet N Wild 2% Milk 
For the base coat, I did just one coat of 2% Milk. This is just to polish my nails, instead of using my regular nails for the half moon effect. So this color is my favorite for a natural looking polish for my skin tone and it's somewhat of an opaque consistency. 
  • Accent Color: Revlon Colorstay Provence 
And then, my accent color is Revlon's Colorstay Provence, a light lavender polish. Since I'm choose very subtle colors, it'll be hard to really distinguish the half moon effect but that's exactly my point. I don't want such a drastic color change. Anyways, start painting your nails by leaving a half circle unpainted against your cuticles. You can easily create this with no problem if you use nail strips to have a cleaner finish. (Like the ones you would use for a French Tip except reverse its direction). I put about two coats of this polish. 
  • Second Accent: N.Y.C. Scandalous Blue Glitter 
Then to create an iridescent effect I layered on N.Y.C.'s Scandalous Blue Glitter on top of my whole nail. Yep, my whole nail, then I put a second coat on just the accent color. And a third coat at the bottom third of my nail. (Like you're kind of creating a gradient). 
  • Microbeads: Gold Microbeads
Once you've completed that step, use a dotting tool to outline your half moon with Gold Microbeads. Do this to all of your nails. To be honest, this step was pretty tedious and took the most time. But the outcome is totally worth it. 


  • Rhinestones: Pink & Purple Teardrop Rhinestones
Next, I used Teardrop Rhinestones to add more color to the design. I chose to create a purple heart on my thumb and ring finger. I just placed two purple teardrop rhinestones right next to each other. And on the rest of my other nails, I created a pink fan by placing three pink teardrop rhinestones next to each other but making sure that they are slightly curved. 
  • Top Coat: Seche Vite
When you're happy with your results, generously slab on your top coat. Make sure to get all around the beads and rhinestones to seal them in and not them run off! 
  • Dry Drops: Sally Hansen Dry Drops 
Then to not dent or ruin your nails while waiting for them to dry. Top it off with Dry Drops to harden and seal in your polishes in a shorter amount of time. 


Thursday, April 18, 2013

Polish Sighting: Sally Hansen Magnetic Nail Color

Sally Hansen's been on a roll with their limited edition collections. Remember those magnetic nail polishes though? (I honestly feel like not many people were "attracted" by this bandwagon. Haha, get it? Yeah, okay, I know, lame. -__-;)   Well, they've made it more appealing by creating more magnetic designs and color shades. First seeing these magnetic nails, I was truly intrigued, but when I first got the chance to use it I found that it was only okay. I wasn't crazy about them, you really had to work fast before the polish dried or else the iron in the polish wouldn't be moveable by the magnet. Anyways, this nail collection is complete with 5 shades: Comic Blue, Slate Spark, Purple Magnitude, Pink Force, and Atomic Alloy. The designs are more intricate but I don't really see many people still jumping this hype. What's your thoughts on the magnetic polishes? Does it have leave a strong attraction for you that you might want to try out these limited edition ones? They priced at approximately $8-10, if I'm not mistaken.*Please excuse my blurry photo. 

Don't forget to "Like" Kolorful Nails on Facebook for updates and extras!

Saturday, April 13, 2013

Polish Sighting: Sally Hansen Diamond Strength Limited Edition


Sally Hansen is always at the top of their game and with a variety of different lines, they've got a handful of new polishes collections out. Aside from their "Under the Sea Collection" for the Complete Salon Manicure, they didn't forget about their Diamond Strength line, a limited edition set complete with 8 different hues to complete it. Almost on the opposite spectrum of the Under the Sea, this covers the pastel hype of Spring. Up top is a photo of 7 of the 8 polishes, starting with (left to right) Opulent Opal, Diamond Jubilee, Fancy Diamond, Brilliant Cut, Sparkling Jewel, Flawless Pink (missing from photo), Gold Setting, and Rock'n Wedding. 

So if you want a more sophisticated or sheer finish, most of the Diamond Strength polishes come with shimmer and are pretty strong polishes. This line is more pastels and focused on the classy or mature styled individuals.

Friday, April 12, 2013

Fancy Friday: Plaid & Simple


For this week's Fancy Friday you will only need a base color and a striper brush or a short/thin nail brush. It's optional to have rhinestones and beads to add just a little something to your design.


  • Base Coat - OPI Nail Envy 
The usual first step is to protect your nails with a base coat, this normally always changes for people. We have our own preference that really works for us. 
  • Background - Rimmel 60 Seconds Mintilicious 
Begin with two coats of your background color of choice. I decided with a pastel color, Rimmel's Minitilicious which might I add is pretty mint-y in hue. It's totally a spring color. 
  • Plaid Effect - Rimmel Lasting Finish Pro Nail Enamel French White Nail Tip Liner
Once your background color has dried, create your plaid effect. There are two ways of going about this. One, you can use a striper nail art polish or two, you can use any regular polish and just use a thin and short nail art brush to create your stripes. Begin by creating vertical (in my case White) lines on your nails, make sure to have different widths and not to leave it too chunky on the brush. Then you can create your horizontal lines, the same way, different widths. 
  • (Optional) 3D Design - Rhinestones & Pearls 
This is totally optional, a plaid design on its own would be totally fine. I was just curious to play with my new toys. I decided to use a medium sized pearl at the center of my middle finger and surrounded it with clear and dark blue rhinestones. Then, closest to the cuticle I placed a smaller sized pearl. It kind of reminds me a brooch though it was not intentional. 
  • Top Coat & Dry Drops - Seche Vite & Sally Hansen Dry Drops 
Once you're content with your design, add your top coat and seal it with your choice of dry drops! 


Thursday, April 11, 2013

Product Review: Sally Hansen's Salon Nail Effects Nail Strips

Another nail strip product review, so far we've gone over Maybelline and L'Oreal's versions.

Now onto the next, Sally Hansen's Salon Effects, I've tried them a couple of times and it's been an all right experience. But I constantly hear from coworkers and some customers that it did not work for them when they attempted to use it. The complaints were normally that the product lacked adhesion. My conclusion for this reasoning is that it probably does not have a long lifespan on the shelf.

Based on my personal experiences, they worked out just they said they would. They lasted approximately a week or so and stayed on. What I normally did was made sure that my nails were clean and free of any oils and polishes by wiping 100% acetone prior to applying the nail stickers. The directions do say to buff the nails for better adhesion but the second time around, I didn't even find it necessary since it stuck on pretty well.

On the other hand, I have found batches on the shelf or from customers' returns that had no adhesion on it whatsoever. Maybe it may have completely dried due to some kind of puncture in the packaging or just an unlucky batch?

I guess, it may just be a hit or miss on buying them and hoping they'll work. I just wish they'd have a wider variety where the designs were more subtle to capture the more mature crowd too.

Saturday, April 6, 2013

Kolor My Nails: A Little Offset


This will be a new series to my blog post. Kolor My Nails will just be dedicated to other people's nails I've done for them for fun. I don't always have a lot of time on my hands, so this will be a rare blog that'll just pop up every now and then. But I figured it would be nice to share what others request when I get the chance to play with my polishes outside of preplanned blogs. 

In this Kolor My Nails, my boyfriend's mom requested to have something different but not too drastic. For her main polish she chose OPI My Private Jet and for her accent nail she chose Zoya Adina. To make the sheer polish more true to color, I used Sally Hansen Insta Dri as it's base to achieve the accent nail. To add a little more design she chose orange, green, and clear rhinestones and I added a blue bowtie rhinestone to it. 

Just a simple and fun offset nail manicure! :)